")
Data validation in Excel is one of the most powerful tools for managing, analyzing, and reporting data. We often focus on functions, formulas, and pivot tables. But one critical thing is to apply them here for data accuracy. Data Validation becomes essential in Excel.
We are giving you a 100% complete guide for Aspirants like Coursera. You don’t need to search anywhere after reading this article once.
If you’re managing a product inventory, entering student marks, or building a financial model. Excel’s Data Validation helps you control what data to be enter into a cell. This protects you from making errors and enforces consistency. It saves your time for cleanup work anytime and anywhere.

In this complete guide, we will explore the following for you:
- What is Data Validation?
- Benefits of Data Validation
- How to apply different types of Data Validation
- Examples in real environment scenarios
- Troubleshooting and tips
- Advanced techniques with formulas
- Common mistakes need to be avoided
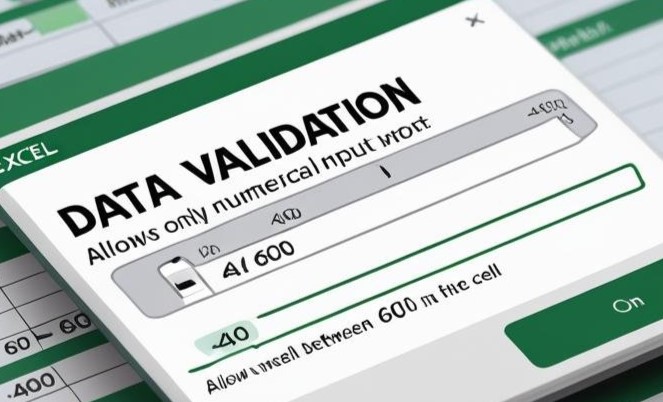
What is Data Validation?
Data Validation is a tool or function in Excel that prevents the type of data or the values that you can enter into a cell in Excel’s spreadsheet.
Now, you can apply a filter for desired results from Excel sheets. That will make you sure about data validation in Excel. It can be used with many types of filters, that is given in paragraphs below.
- You can allow only numbers between 1 and 100.
- You can force a user to select a value from a dropdown list.
- You can block invalid dates or duplicate entries.
You can use a filter according to your needs that ensures your worksheet only receives reliable and expected inputs. Now you can understand Data Validation in Excel as well.
Why Use Data Validation?
My expectation is not to give knowledge about why to use data validation, but to give in-depth information about it. Let’s come to know why it is essential for every Excel user.
- ✅ Accuracy – It will prevent you from invalid entries like text in a number field.
- 🔁 Consistency – It ensures you follow the same format or values.
- 🚫 Error Control – It will give you alerts before wrong data is entered.
- ⏱️ Saves Time – It will reduce data cleaning, manual verification, and cross verification.
- 📋 User Guidance – Data validation shows prompts and input messages.
If you are managing a customer database with email IDs. If someone by mistake enters a phone number instead.
Then you will find that your entire system will break. Such that Data Validation prevents you from these unwanted things..
How to Use Data Validation in Spreadsheets.
Let’s come, we start from scratch:
🔹 Step 1: Select the Cell(s)
Now, you have to click and highlight the cells where you want to apply data validation.
🔹 Step 2: Open the Data Validation Dialog Box
Go to:
Data tab → Data Tools group → Data Validation
Then click:
Data Validation…
A window will open with three tabs:
- Settings
- Input Message
- Error Alert
Let’s explore each and ensure what is useful for you.
Types of Data Validation
1. Whole Number
Here entry will allow only for whole numbers. (e.g., 1 to 10)
- Allow: Whole Number
- Data: between
- Minimum: 1
- Maximum: 10
📌 Use case: Limit student grades to between 1 and 10.
2. Decimal
It allows decimal values only.
- Allow: Decimal
- Data: less than or equal to
- Maximum: 100.0
📌 Use case: Permit price inputs up to ₹100.00
3. List (Dropdown Menu)
You can create a dropdown list from this according to your choices.
- Allow: List
- Source: Red, Green, Blue
📌 Use case: Choose from predefined product categories, departments, statuses, etc.
📝 Tip: You can also give to a range like =A1:A5
4. Date
Date accepts only dates for the given specific range.
- Allow: Date
- Data: between
- Start date: 01/01/2023
- End date: 31/12/2025
📌 Use case: Validating employee joining dates or invoice dates.
5. Time
It works like Date, but for Time values.
- Allow: Time
- Data: greater than
- Time: 9:00 AM
📌 Use case: Ensure bookings are be after office hours.
6. Text Length
It will control the number of characters typed in Excel sheet.
- Allow: Text Length
- Data: less than or equal to
- Maximum: 10
📌 Use case: Restrict mobile number to 10 digits.
7. Custom (Using Formulas)
You can make powerful filters or restrictions by using it. You can use formulas to create custom validation logic manually according to your choices.
Example:
Excel
Copyedit
=ISNUMBER(A1)
This allows only numbers in A1.
Or use:
excel
Copyedit
=AND(A1>0, A1<100)
It allows only numbers between 1 and 99.
📌 Use case: Custom business rules, conditional checks.
Input Message and Error Alert
🔸 Input Message Tab
You can show a message when a user selects the cell.
- Title: “Enter Product Code”
- Message: “Please enter a 6-digit numeric code.”
This message guides users before they enter data.
🔸 Error Alert Tab
It will make you ensure when invalid data is entered.
- Style: Stop / Warning / Information
- Title: “Invalid Entry”
- Message: “Please enter a number between 1 and 10 only.”
You can choose to block (Stop), warn (Warning), or inform (Information) as a short form.
Real-Life Examples of Validation for Data in Excel
Now we would like to tell you about real-life data validation in Excel with a dry run project. You can learn about Vlookup function before taking this project. Anyone can become an expert in data validation in Excel.
✅ Example 1: Employee Attendance Tracker system
- Allow only dates between 1st Jan and 31st Dec.
- Prevent weekend entries using =WEEKDAY(A1, 2)<6
✅ Example 2: Inventory Management
- Use dropdown lists for item categories: Electronics, Grocery, Fashion.
- Limit quantity to 1–500.
✅ Example 3: Online Form Entry
- Mobile Number must be exactly 10 digits.
- Email address must contain @ using =ISNUMBER(FIND(“@”, A1))
Advanced Data Validation with Formulas
1. Prevent Duplicates
Use a custom formula:
excel
Copyedit
=COUNTIF($A$1:$A$100, A1)=1
📌 This ensures each entry in the list is unique.
2. Allow Only Weekdays
excel
Copyedit
=WEEKDAY(A1,2)<6
Blocks weekends (Saturday, Sunday).
3. Validate with Another Cell
Only allow values less than what’s in another cell, say B1:
excel
Copyedit
=A1<B1
4. Email Format Basic Check
Excel
Copyedit
=AND(ISNUMBER(SEARCH(“@”, A1)), ISNUMBER(SEARCH(“.”, A1)))
📝 Note: Excel isn’t perfect at validating email formats, but this is a basic start.
How to Remove Data Validation
To remove rules:
- Select the cell(s)
- Go to: Data → Data Validation
- Click Clear All → OK
Troubleshooting for Common Issues
❌ Issue 1: Validation Doesn’t Work
- Make sure you’re not in a merged cell.
- Ensure the data format (Date, Number) matches the rule.
❌ Issue 2: List Not Showing in Dropdown
- Check if “In-cell dropdown” is checked.
- Confirm the source list is valid.
❌ Issue 3: Bypassing Validation
- Excel doesn’t block copy-paste of invalid data. Protect the sheet to prevent that.
Tips & Best Practices
- 💾 Protect the sheet to stop users from deleting validation.
- 🧪 Test your rules on a small sample before applying to a full sheet.
- 🔁 Use named ranges for dynamic dropdowns.
- 🧮 Combine with conditional formatting to highlight wrong entries.
- 💡 Use INDIRECT() to create dependent dropdown lists.
Data Validation vs Conditional Formatting
We will provide information about data validation and conditional formatting with examples.
Feature Data Validation Conditional Formatting
Purpose Prevent bad data Highlight patterns or errors
Input Control Yes No
Visual Feedback No Yes
Example:
Only numbers allowed
Color cells >100 in red
They work best together. You can use validation to stop unwanted Input, and want to provide real guide for spreadsheet validation.
Conclusion
Data Validation in Excel is better than a normal rule. Your Excel sheet is a powerful formulae to ensure data quality, reliability, and control.
If you’re an accountant, teacher, analyst, or business owner. Then you should use data validation for exact results. You can get more relevant results after using it.
- Prevent costly mistakes
- Improve data entry speed
- Maintain consistency across large datasets
- The user can make sure before entering data in a cell
Now, whenever you build a spreadsheet, you should apply this rule. Now you will find yourself as a professional accountant.